Introduction
I saw mini racks where people build their homelabs and really wanted one. Turns out almost all of them use factory-made 10-inch racks from DeskPi ( https://deskpi.com/ ). After searching for alternatives and ways to buy one of these racks, it became clear that it would cost me at least $250 for 10 units (and that’s without shelves). Then I stumbled upon someone who fully designed and printed this rack on a 3D printer — looked incredibly cool. I faced a choice: order 3D printing and spend about €100 on everything, or buy a 3D printer and do it all myself, while learning something completely new and spending 4 times more time and money. The right option is kind of obvious. :)
Here’s the project I found: Lab Rax — a fully 3D-printed modular 10-inch server rack. Considering that I already have a mini PC with Proxmox (see my homelab series), the idea of printing a rack for it seemed like a logical next step.
I had no experience with 3D printing before. This is the first article in a series where I’ll describe the learning process from buying a printer to printing complex projects.
Goals:
- Learn about 3D printing technology
- Print a rack for my homelab
- Print useful things for home (holders, organizers, mounts)
- Replace broken parts instead of buying new ones
Choosing a Printer
Criteria
List of requirements:
- Noise - I wanted to be able to sit next to the printer while it’s printing without going deaf. Maybe even sleep while the printer works in another room
- Size - I don’t have a big desk where I could put the printer, need something that fits on a dresser
- Budget ~30,000 RSD (~€250-300) — since I’m just starting, I don’t need the fanciest printer with a million features
- Beginner-friendly — auto-calibration, minimal manual setup
- Customization options — wanted the ability to edit configs and use a full web interface (so I could tinker and fine-tune settings as I learned)
Options
After searching for printers in official Serbian stores and classified ad sites, I narrowed it down to four options:
| Model | Price | Comments |
|---|---|---|
| Creality Hi | 29,600 RSD | Klipper, high speed, but harder to maintain due to printhead design |
| Elegoo Neptune 4 Plus | 33,000 RSD | Huge, complex multi-step update procedure, semi-manual calibration |
| Elegoo Centauri Carbon | 40,000 RSD | Very loud |
| Anycubic Kobra 3 | 25,500 RSD | Cheaper, fewer features, customization difficulties |
The most popular beginner printer is Bambulab A1 (perfect quality out of the box). I didn’t consider it due to the completely closed ecosystem and inability to change firmware or edit configs. It’s also more expensive than my budget.
Why Creality Hi
Chose Creality Hi:
- Not locked by manufacturer — Fluidd web interface, SSH access without sketchy unlock scripts, ability to modify configs
- Noise — out of all the models I considered, this was the quietest
- Within budget — 29,600 RSD
Order and What’s in the Box
- Creality Hi printer — 29,600 RSD
- PLA Soleyin Matt White (1 kg) — 1,680 RSD
- PLA Soleyin Matt Black (1 kg) — 1,680 RSD
- PETG Creality Hyper White (1 kg) — 2,600 RSD
- PETG Devil Design “surprise color” (1 kg) — 1,680 RSD
Total: 37,240 RSD (~€320)
Two spools of PLA for regular printing and first experiments. Two spools of PETG bought with the future Lab Rax project in mind.
Unboxing
What’s included:
- Printer base
- Vertical frame with rails and printhead
- Filament spool holder
- Power cable
- Tool set (hex keys, cutters)
- Lubricant
- Needle to clean the extruder
- Test filament (small spool of PLA)
- Assembly instructions
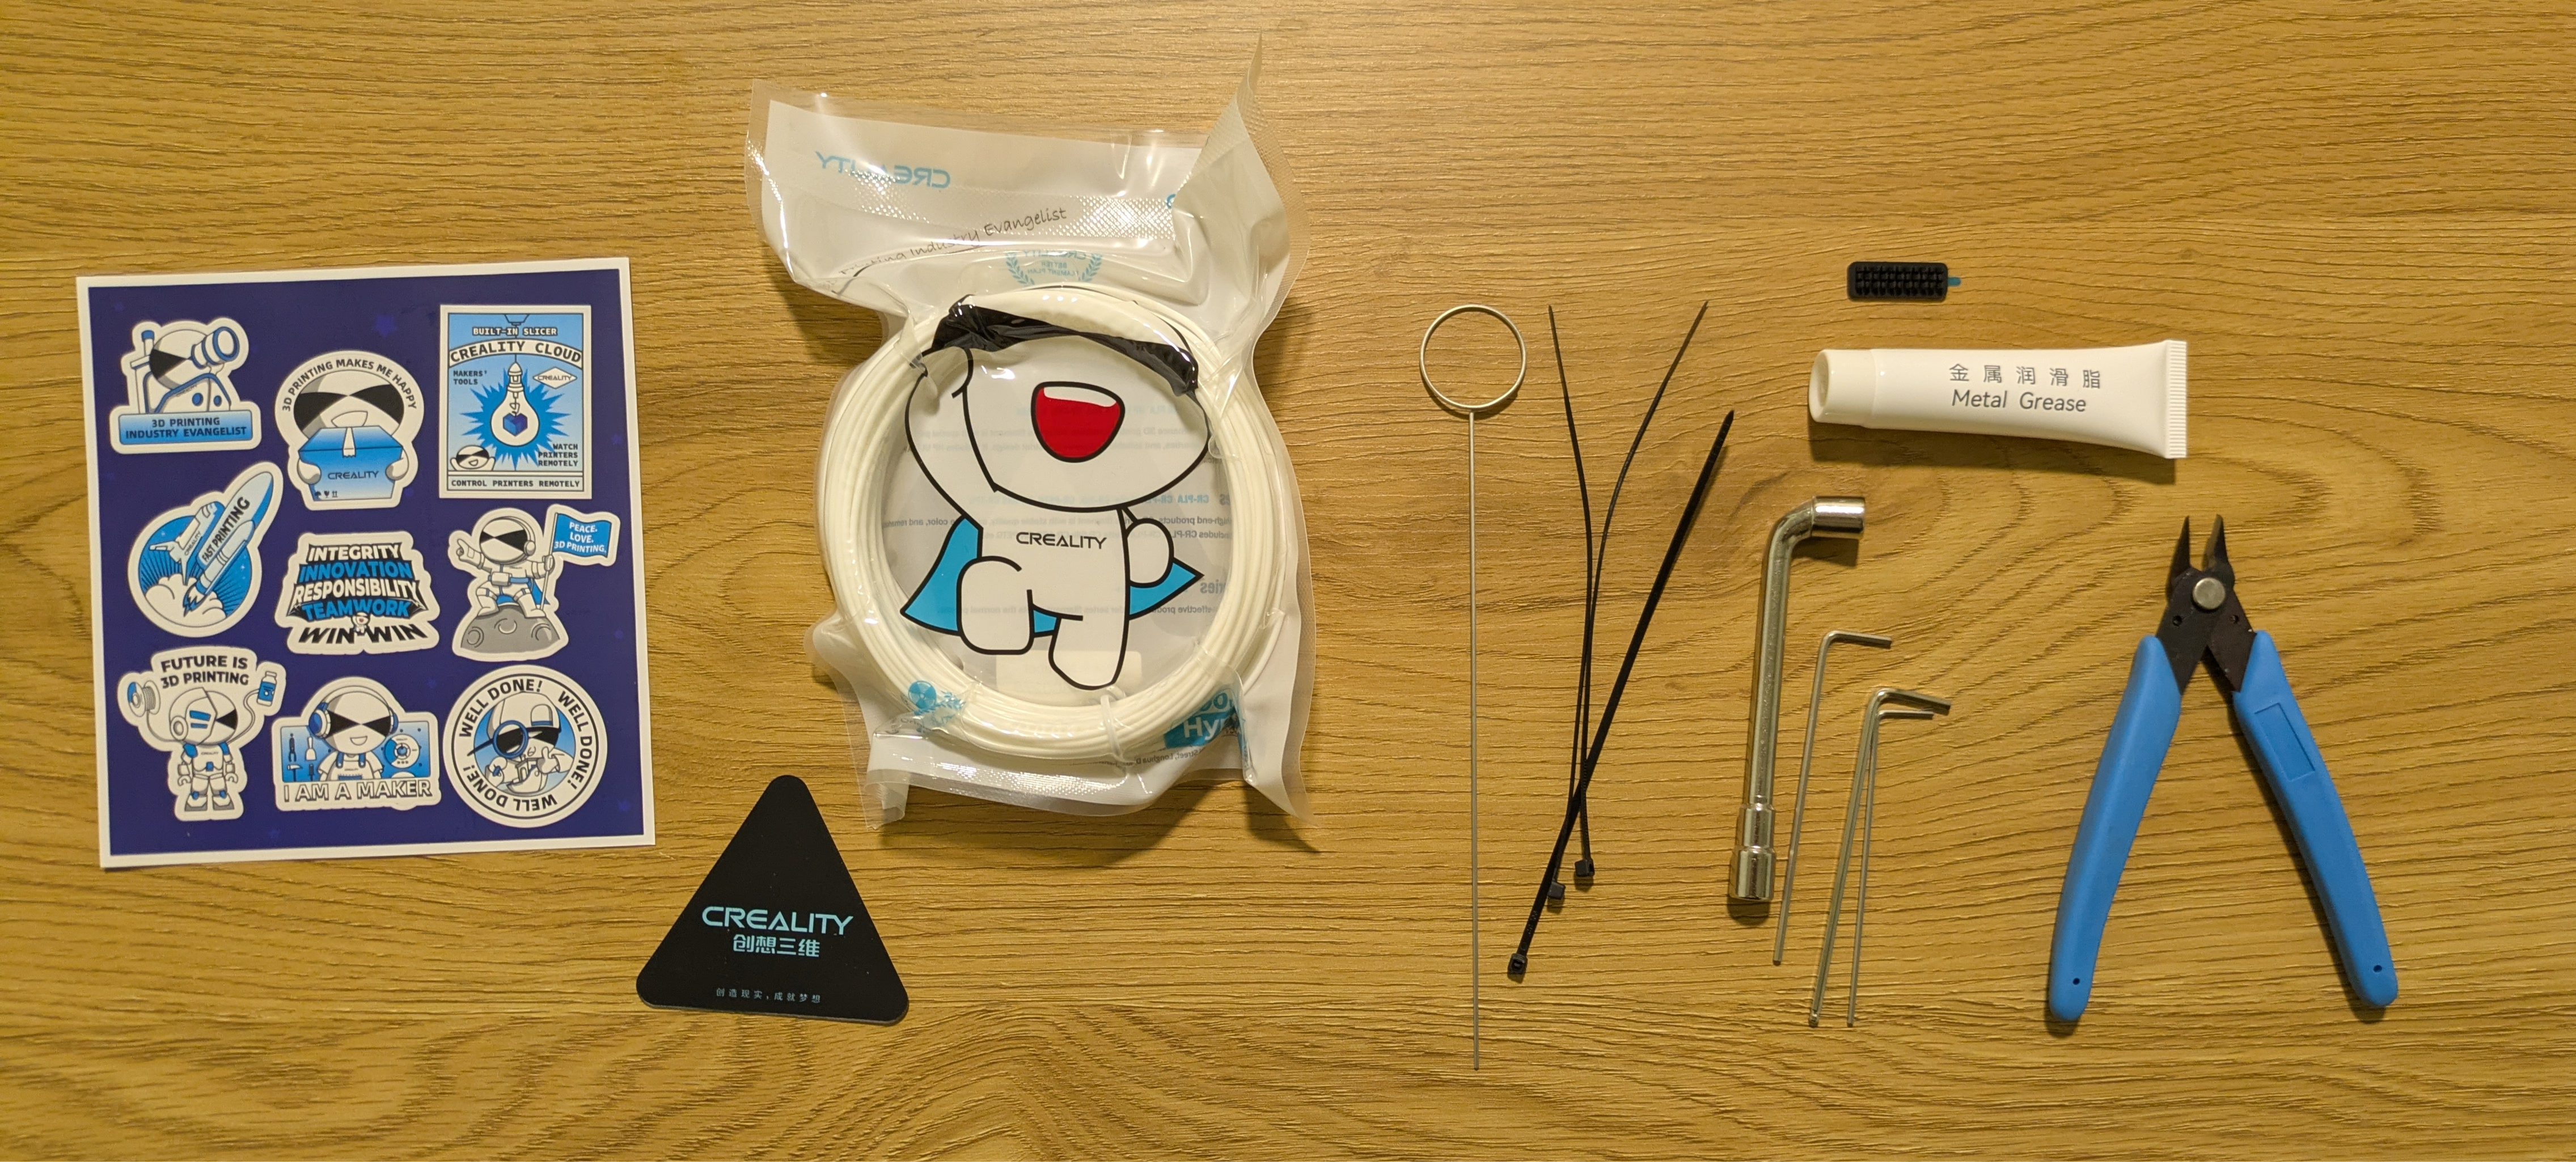
Everything except the printer itself
Assembly and First Start
Assembly
Assembly took less than 30 minutes:
- Placed the frame with rails on the base and screwed in bolts
- Connected cables
- Installed filament spool holder
After powering on, the printer automatically started auto-calibration.

Printer assembled
Interface
Control via 3.2" touchscreen display:
- Print status
- File selection
- Filament settings
- Printer parameters

Touchscreen display
First Prints
During the first week I printed several things: from test models to useful household items. All prints were done with PLA filament using default slicer settings.
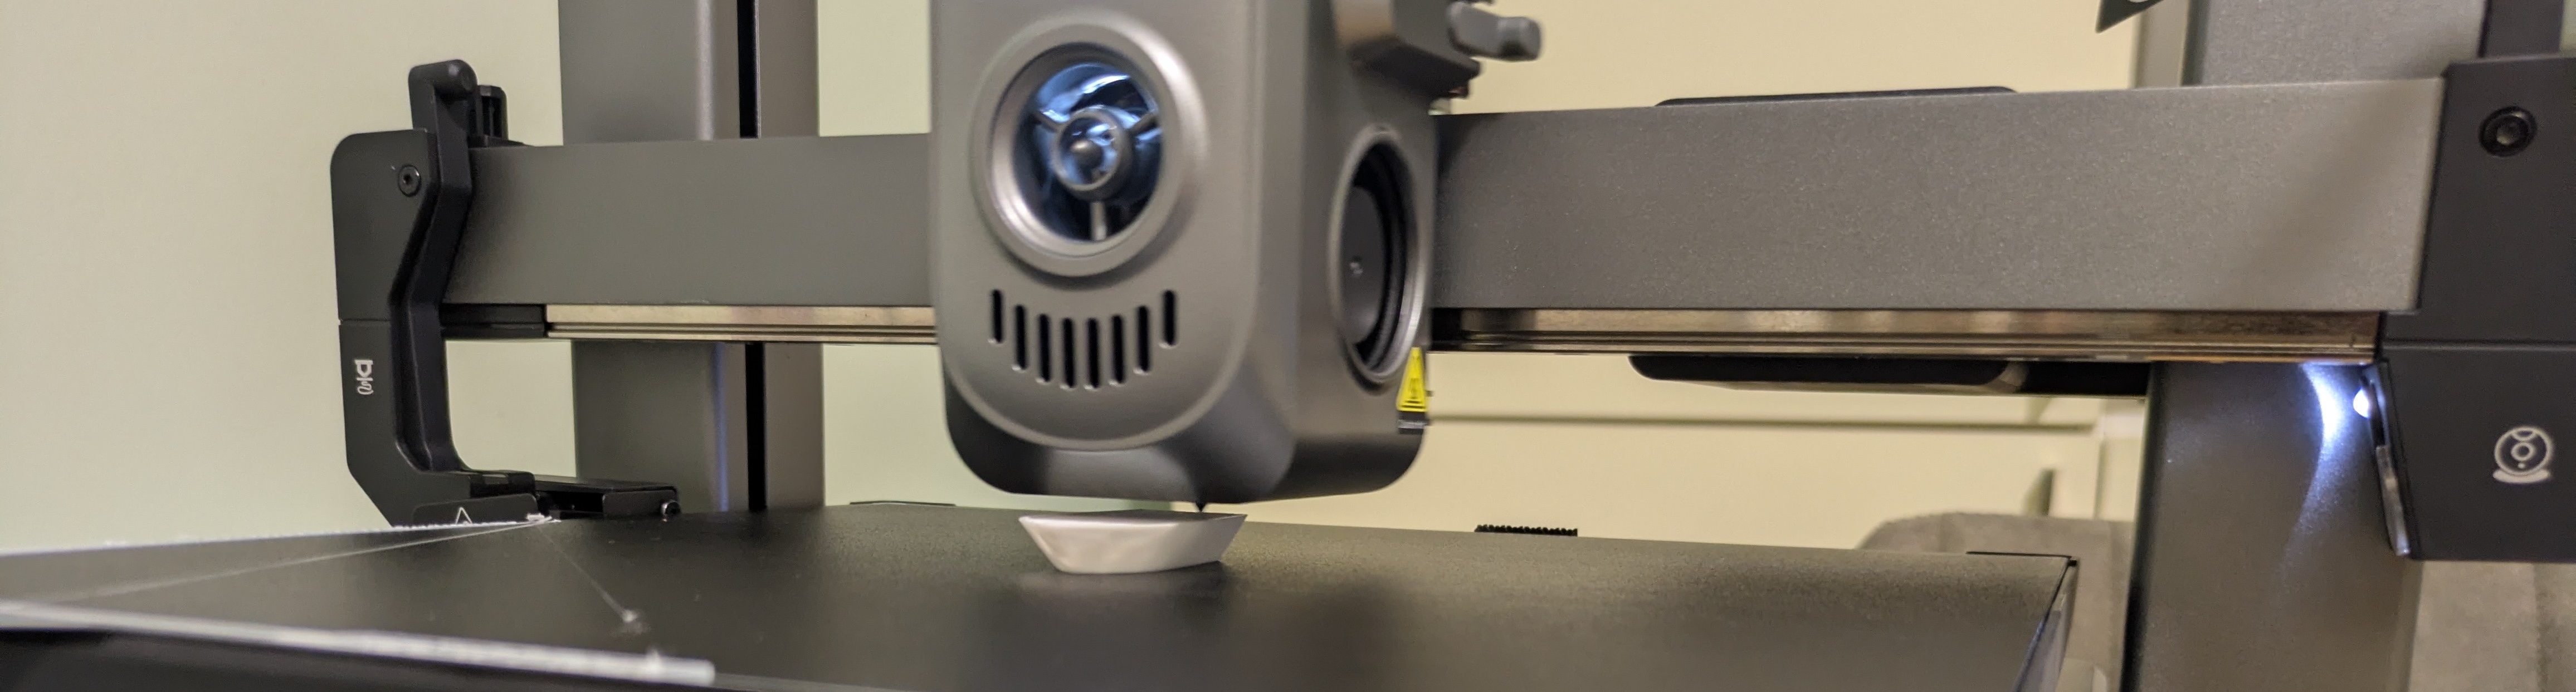
Block PLA — First Print
The printer came with a preloaded file block_PLA_17m (17 minutes of printing). Turns out, this is a block for waste filament. At the start of a print, the printer extrudes plastic to clear the nozzle, and this block prevents it from flying off to the side.
Waste filament collection system in action
Installing OrcaSlicer
To prepare models you need a slicer — a program that converts a 3D model into G-code (instructions for the printer).
I chose OrcaSlicer — free, with ready profiles for Creality Hi. Later I also tried the official Creality Print, which I used more often due to built-in camera support (more on this in the “Printer Control Options” section).
Installation:
- I installed it using
homebrew, but you can just download from GitHub - Selected Creality Hi printer from the list
- Settings profiles loaded automatically
Benchy
The standard test — a small boat that shows the printer’s capabilities (fine details, overhangs, bridges).

Benchy with default settings
With default settings it came out fine. Fine details are visible, overhangs are clean.
Knitting Stitch Markers
My wife asked me to print stitch markers for knitting, which she was running out of. Found a model on MakerWorld, printed 10 pieces.
Filament Change
After the markers, I wanted to print a box for waste filament (which I’ll talk about below), and it needed black filament. The change process:
- On the display: Filament Settings → Retract
- The printer automatically retracted and purged the remaining filament
- I changed the spool and fed the filament to the printhead
- Pressed: Extract
- The printer pulled the filament to the nozzle
Took a couple of minutes. Seems simple enough, but the first time you’re always nervous about breaking something.
Buttons — First Problem
Buttons for a knitted item: two large (4 cm) and three small (2 cm).
The surface came out rough. Most likely a speed issue — small details, possibly the printer doesn’t have time to extrude plastic (under-extrusion). Left speed setting experiments for later, the buttons work fine anyway.
Useful Home Prints
Cable Holder with Desk Clip
First model with overhanging surfaces. To print such a part, you need supports — temporary scaffolding that’s removed later.
In OrcaSlicer I tried Tree Supports (tree-shaped supports). They grow from the bed and branch out toward overhanging parts of the model. Take up less space and are easier to remove than regular straight supports.
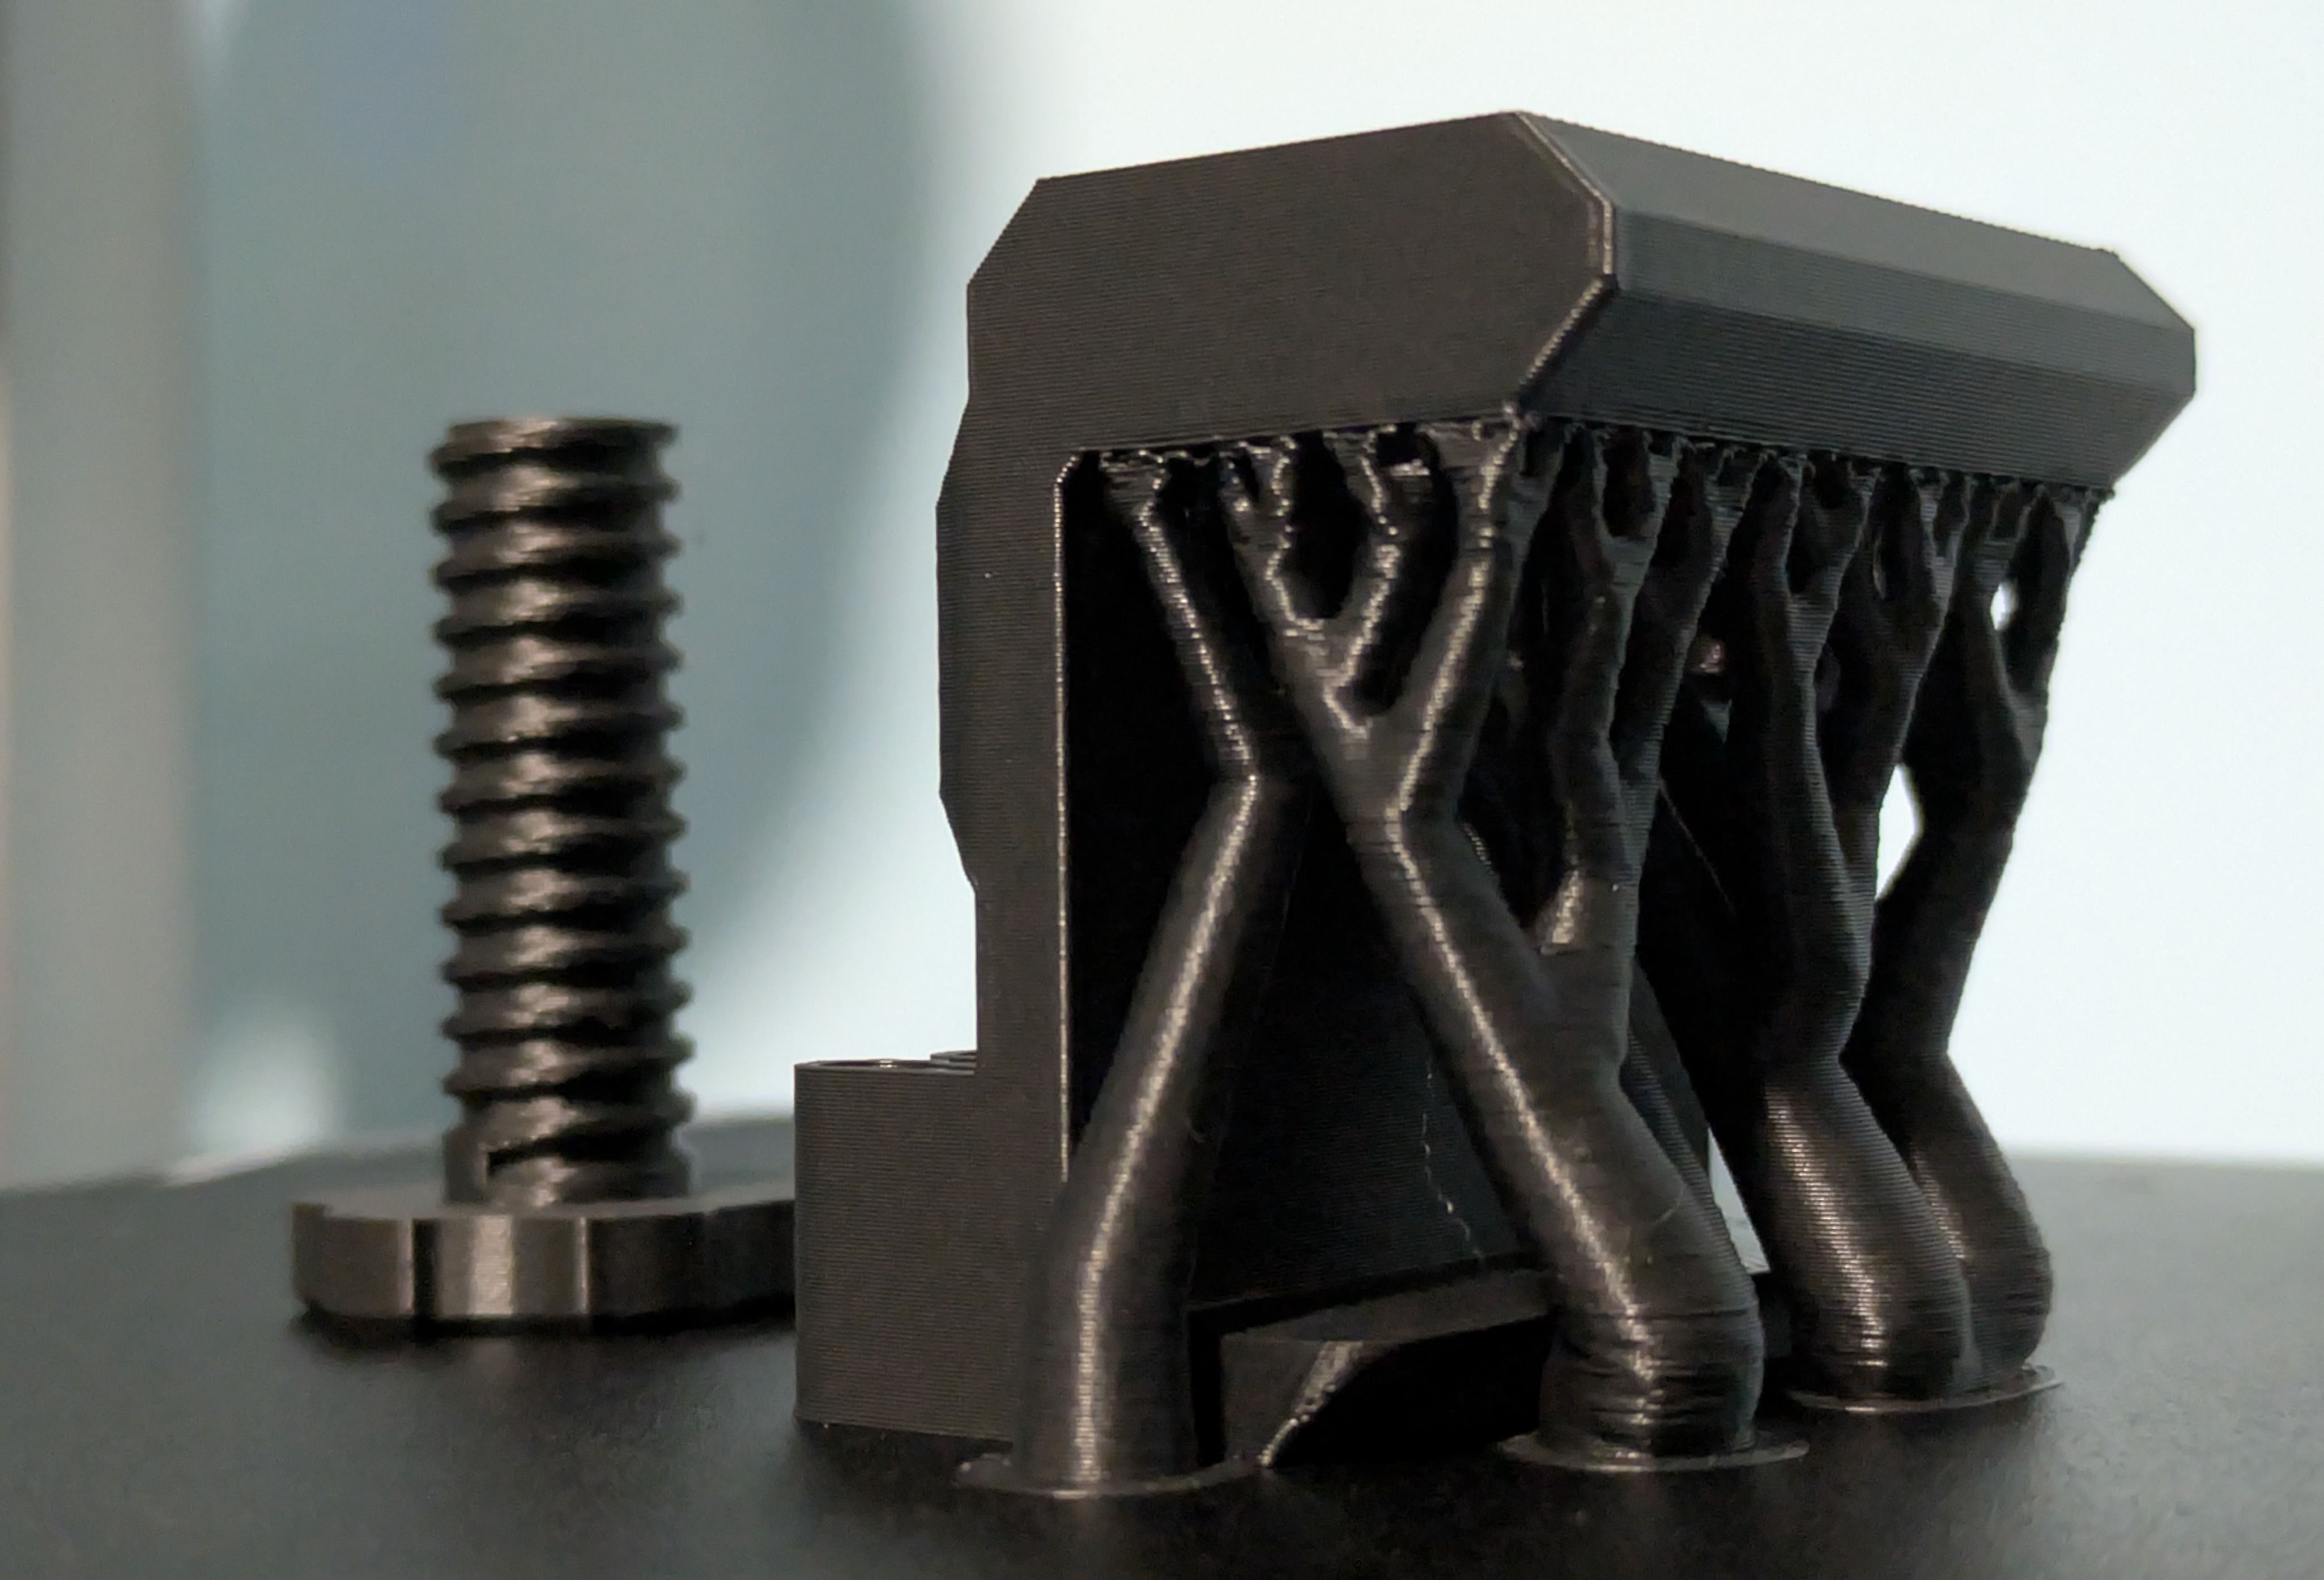
Cable holder printed with tree supports
After printing the supports broke off without issues, the surface underneath came out slightly rough but acceptable. The holder works great. I have attached a USB cable to the edge of the desk.
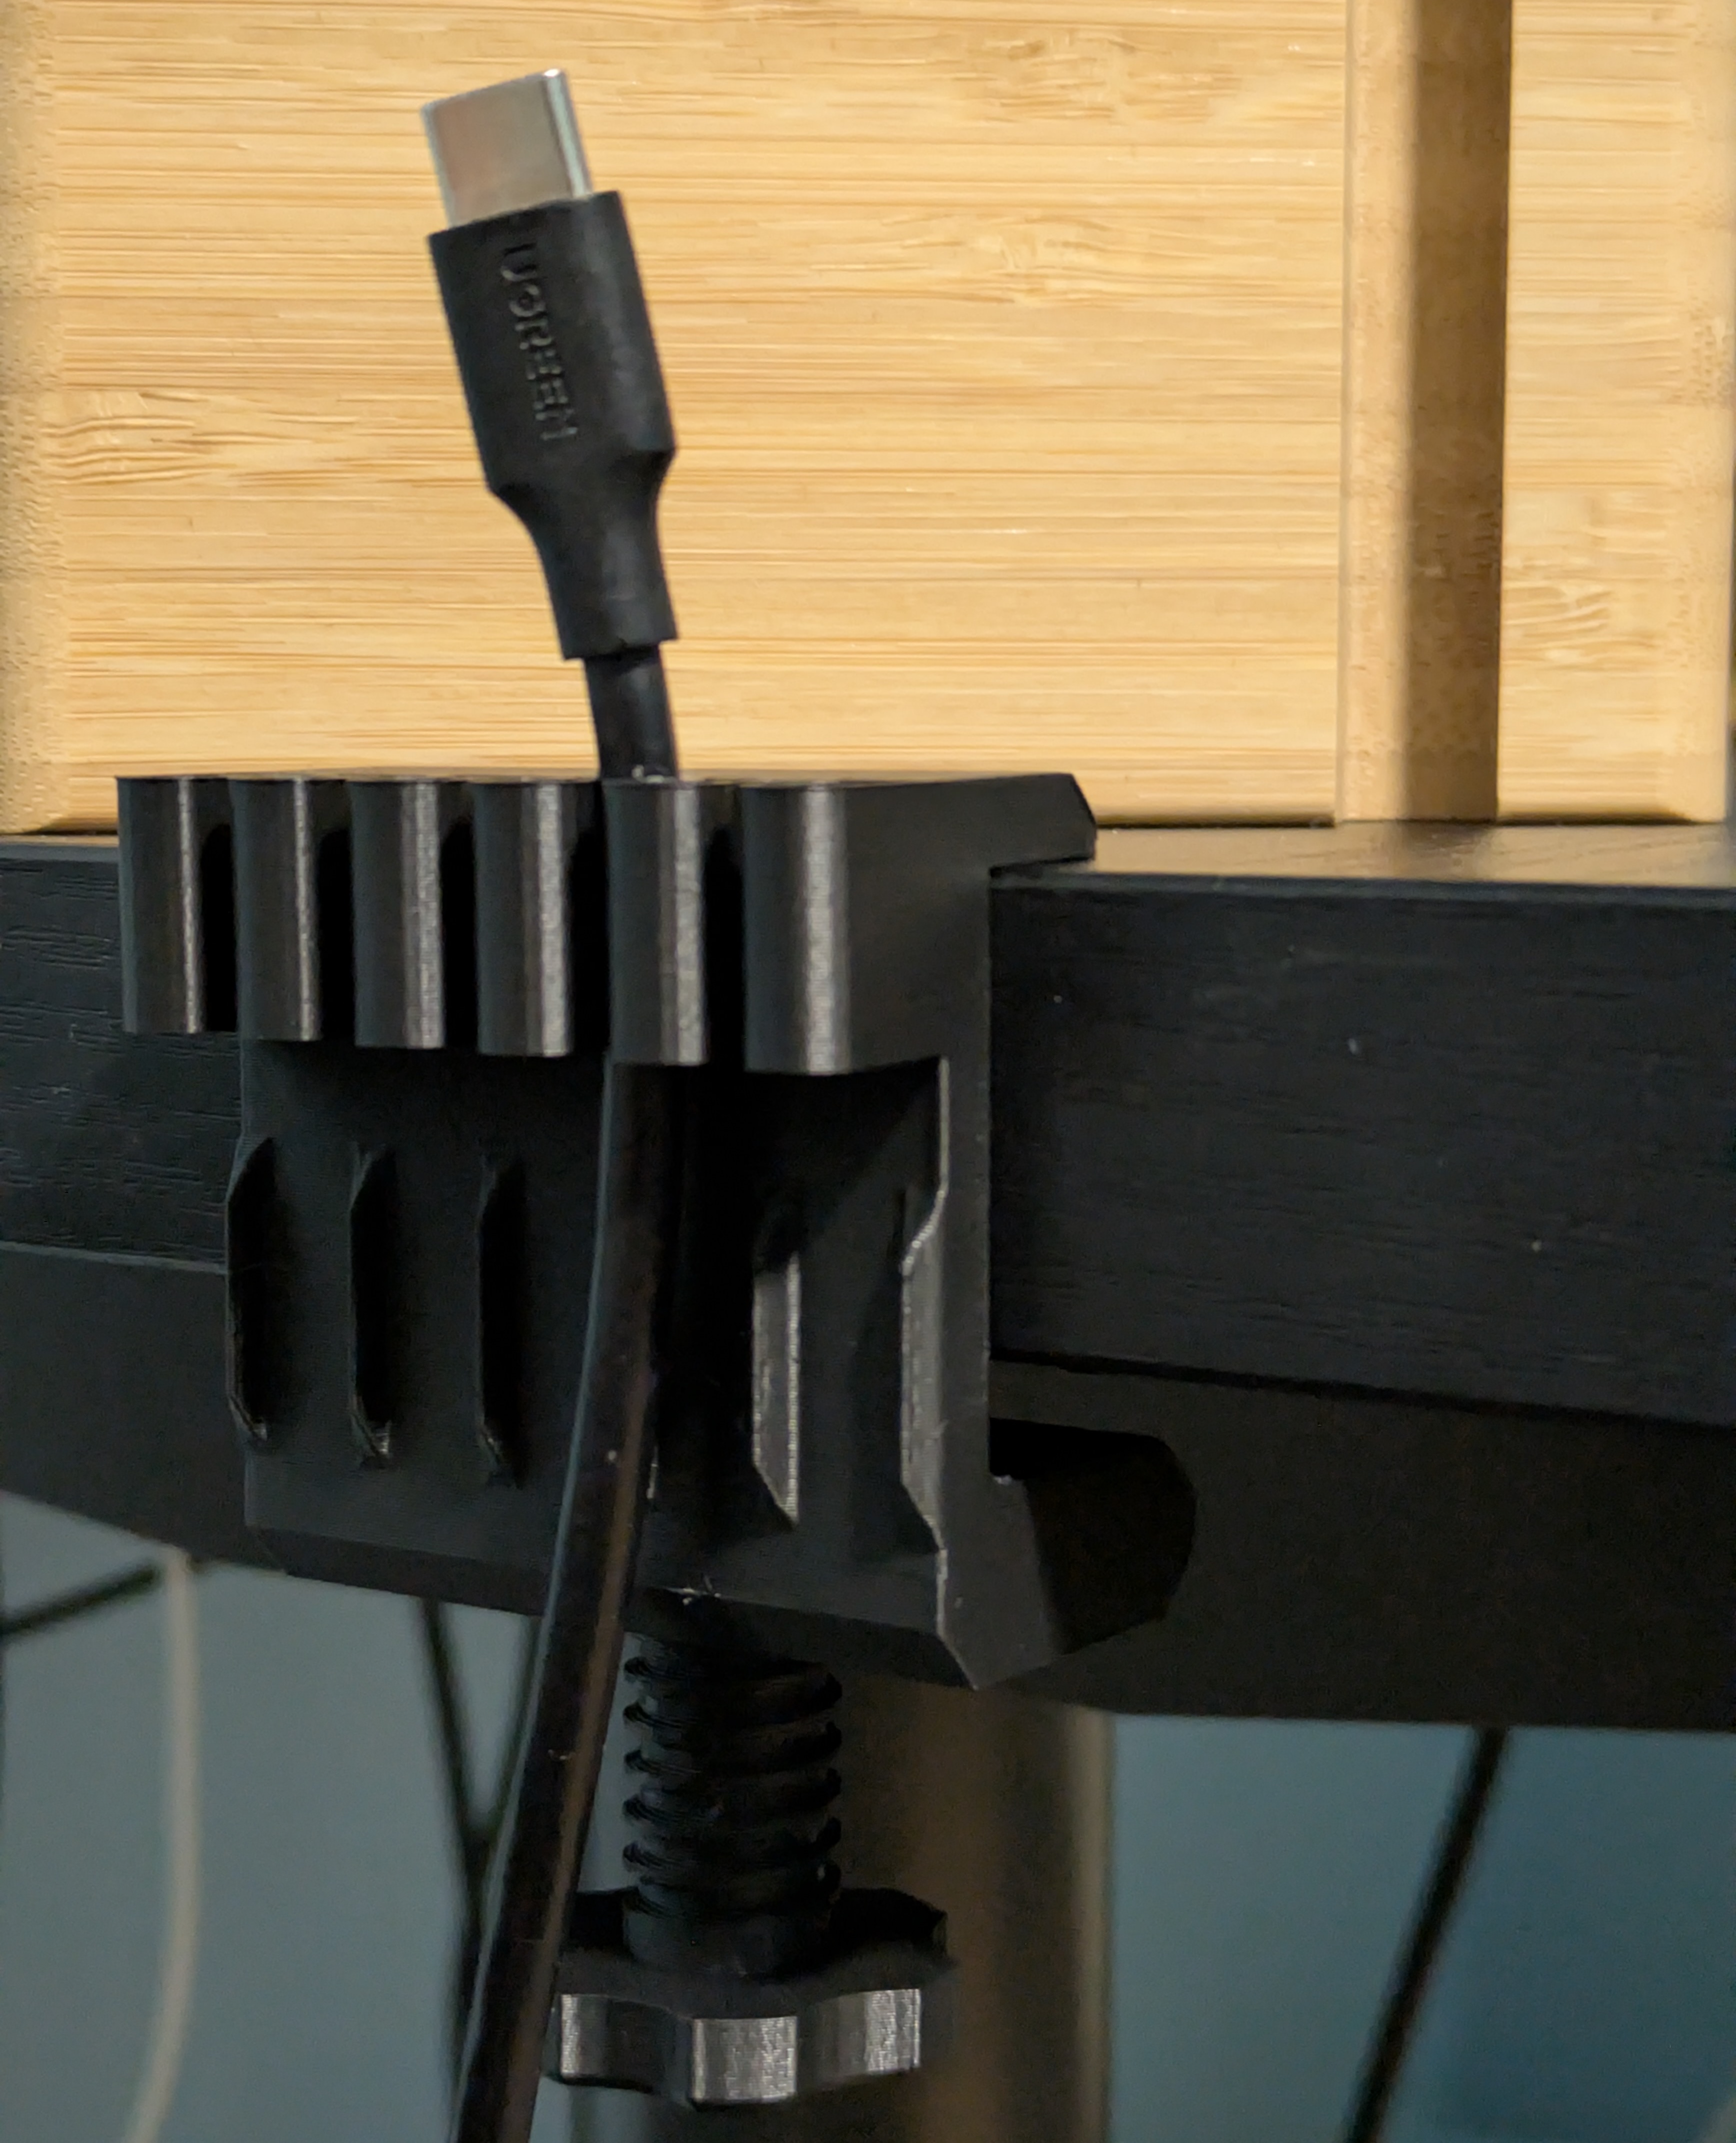
Finished holder after removing supports
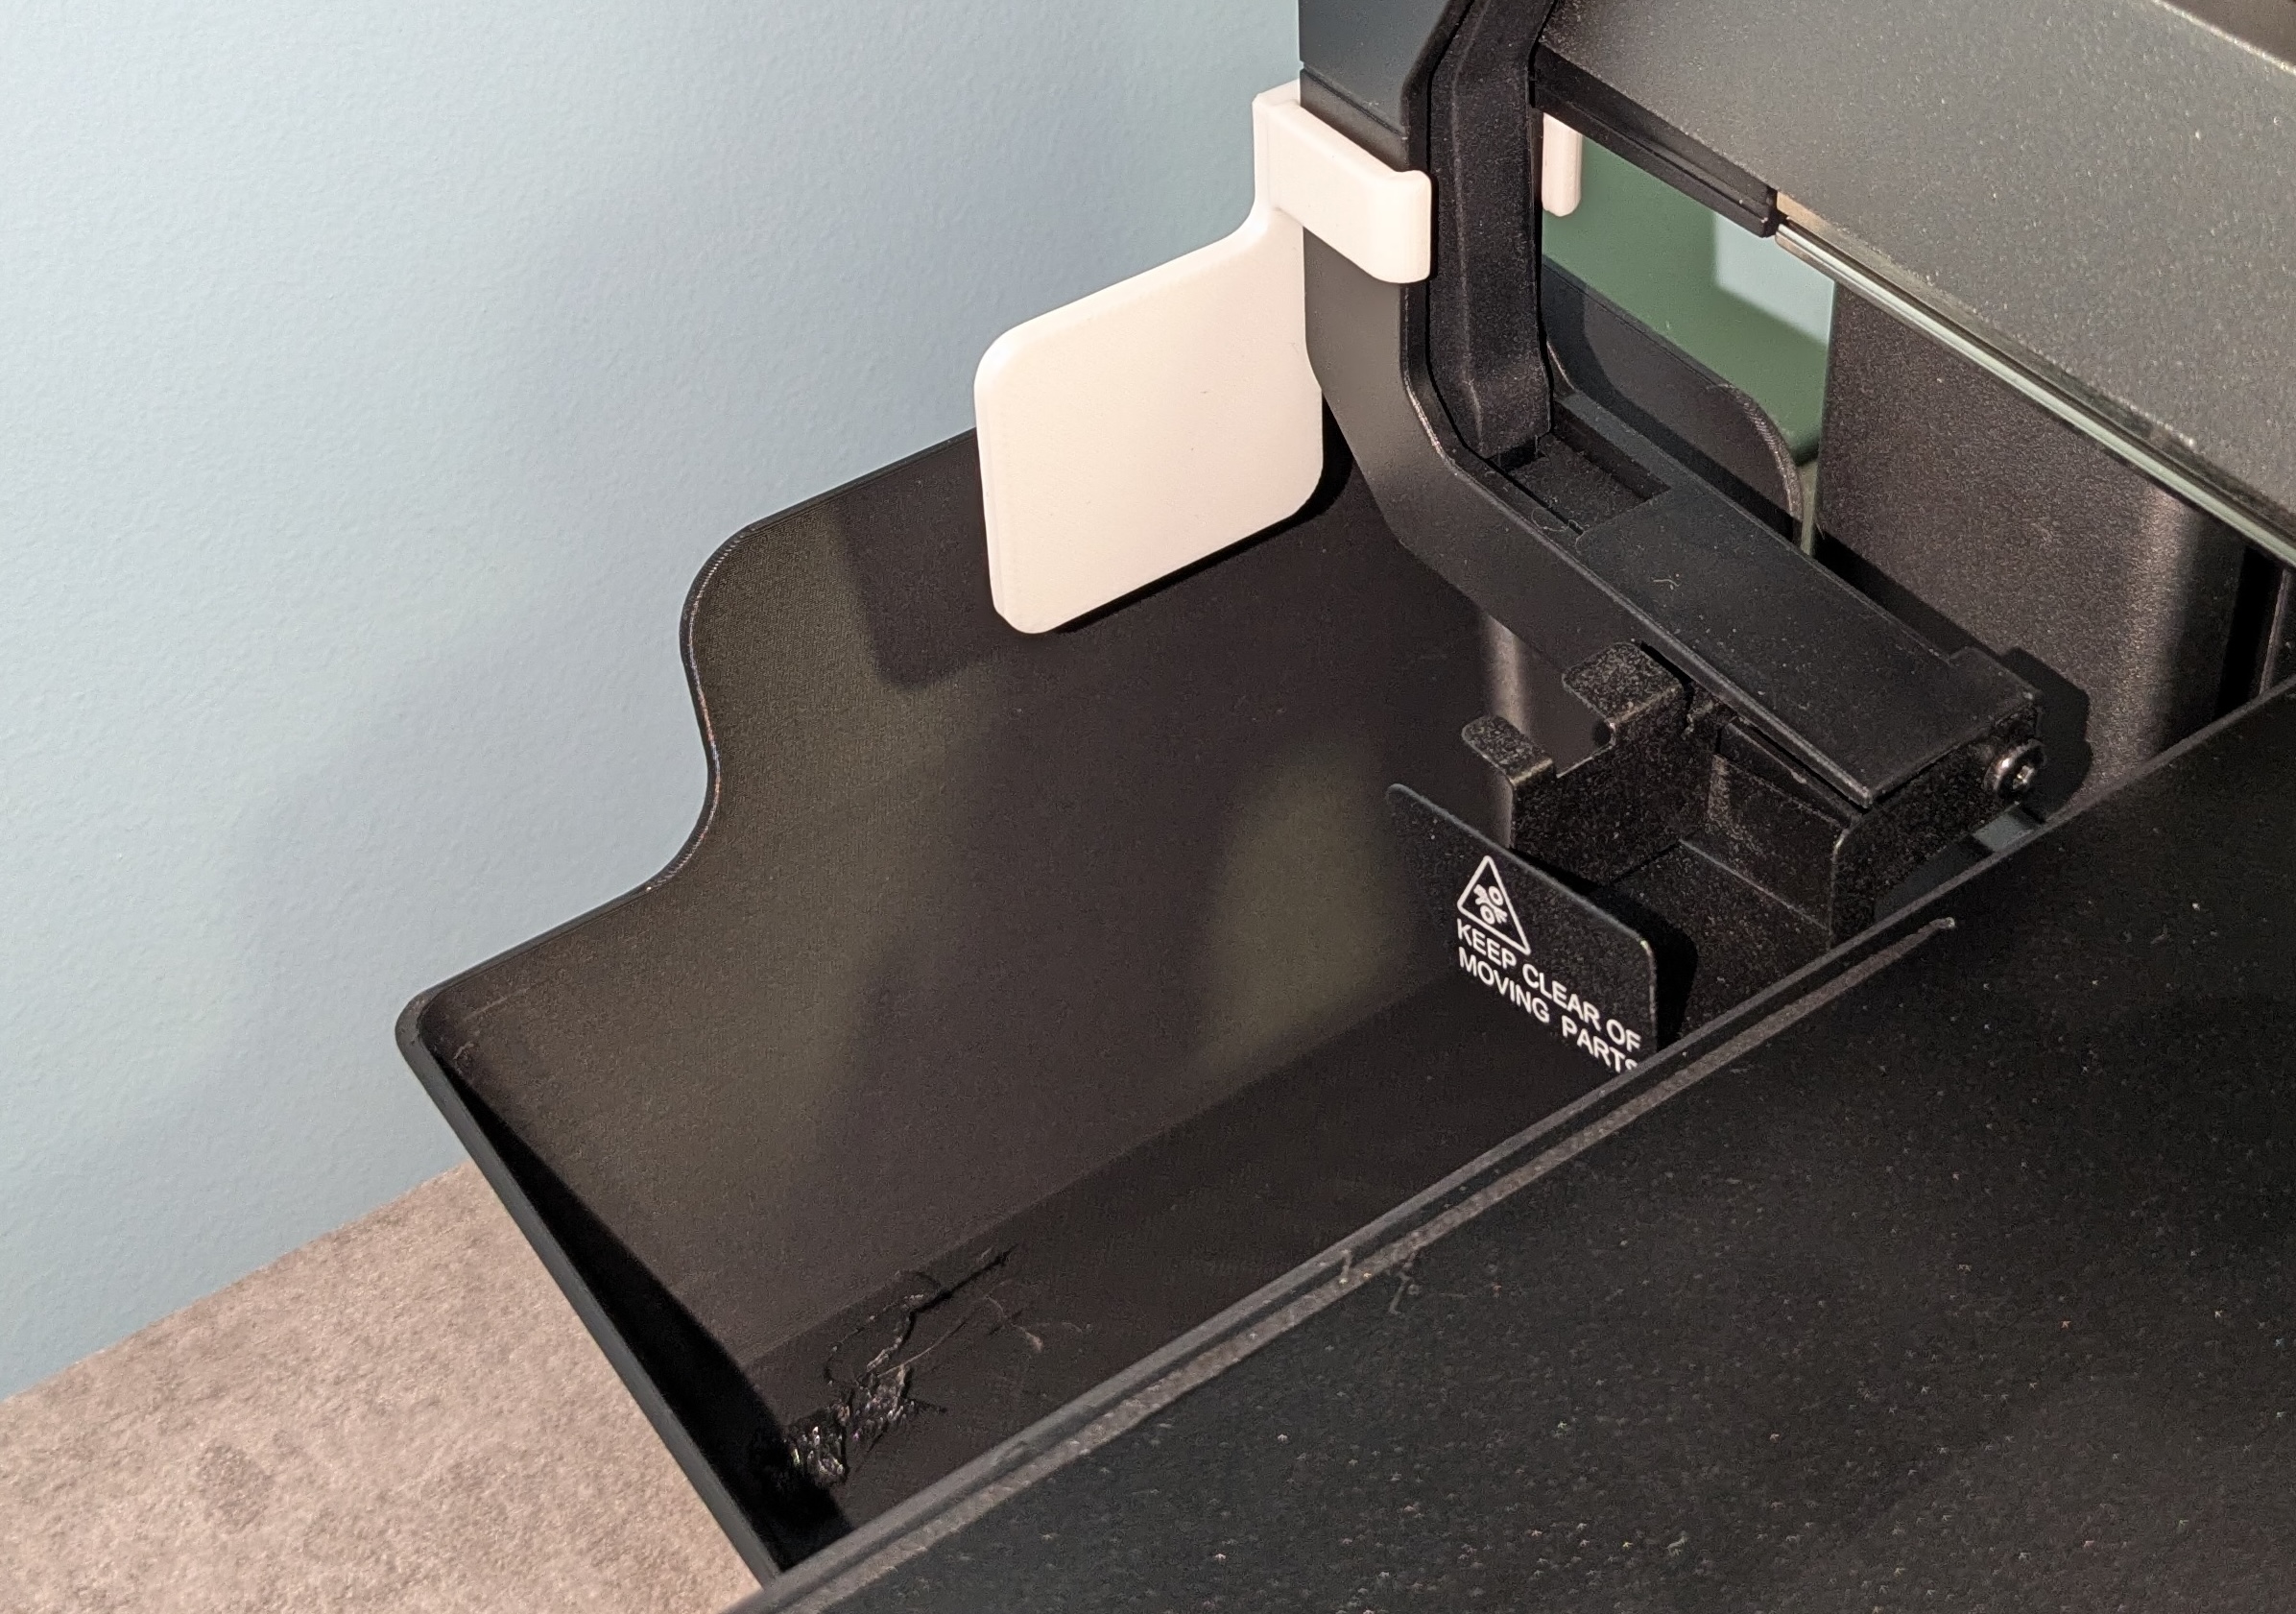
Waste Filament Box
After block PLA proved useful, I decided to print a box for it where waste filament would fall. Used black PLA.
Printed successfully, but OrcaSlicer automatically added a skirt to the print — an additional perimeter around the model. It turned out to be harder to separate from the main print than expected. Next time I’ll check settings before starting. I’m sure this simple print would have come out fine anyway.
The box fit perfectly into the system. Now waste filament collects neatly instead of flying to the floor.
Vase Mode Attempt
OrcaSlicer has vase mode (Spiral Vase). It prints the object as one continuous spiral without top and bottom layers. Looks better than layer-by-layer printing because it doesn’t leave a seam on each layer.
I tried printing a small vase. The print succeeded, looks cool, but the vase came out with small gaps. Somewhere the spiral didn’t lay tight. Fine for decoration, but doesn’t hold water.
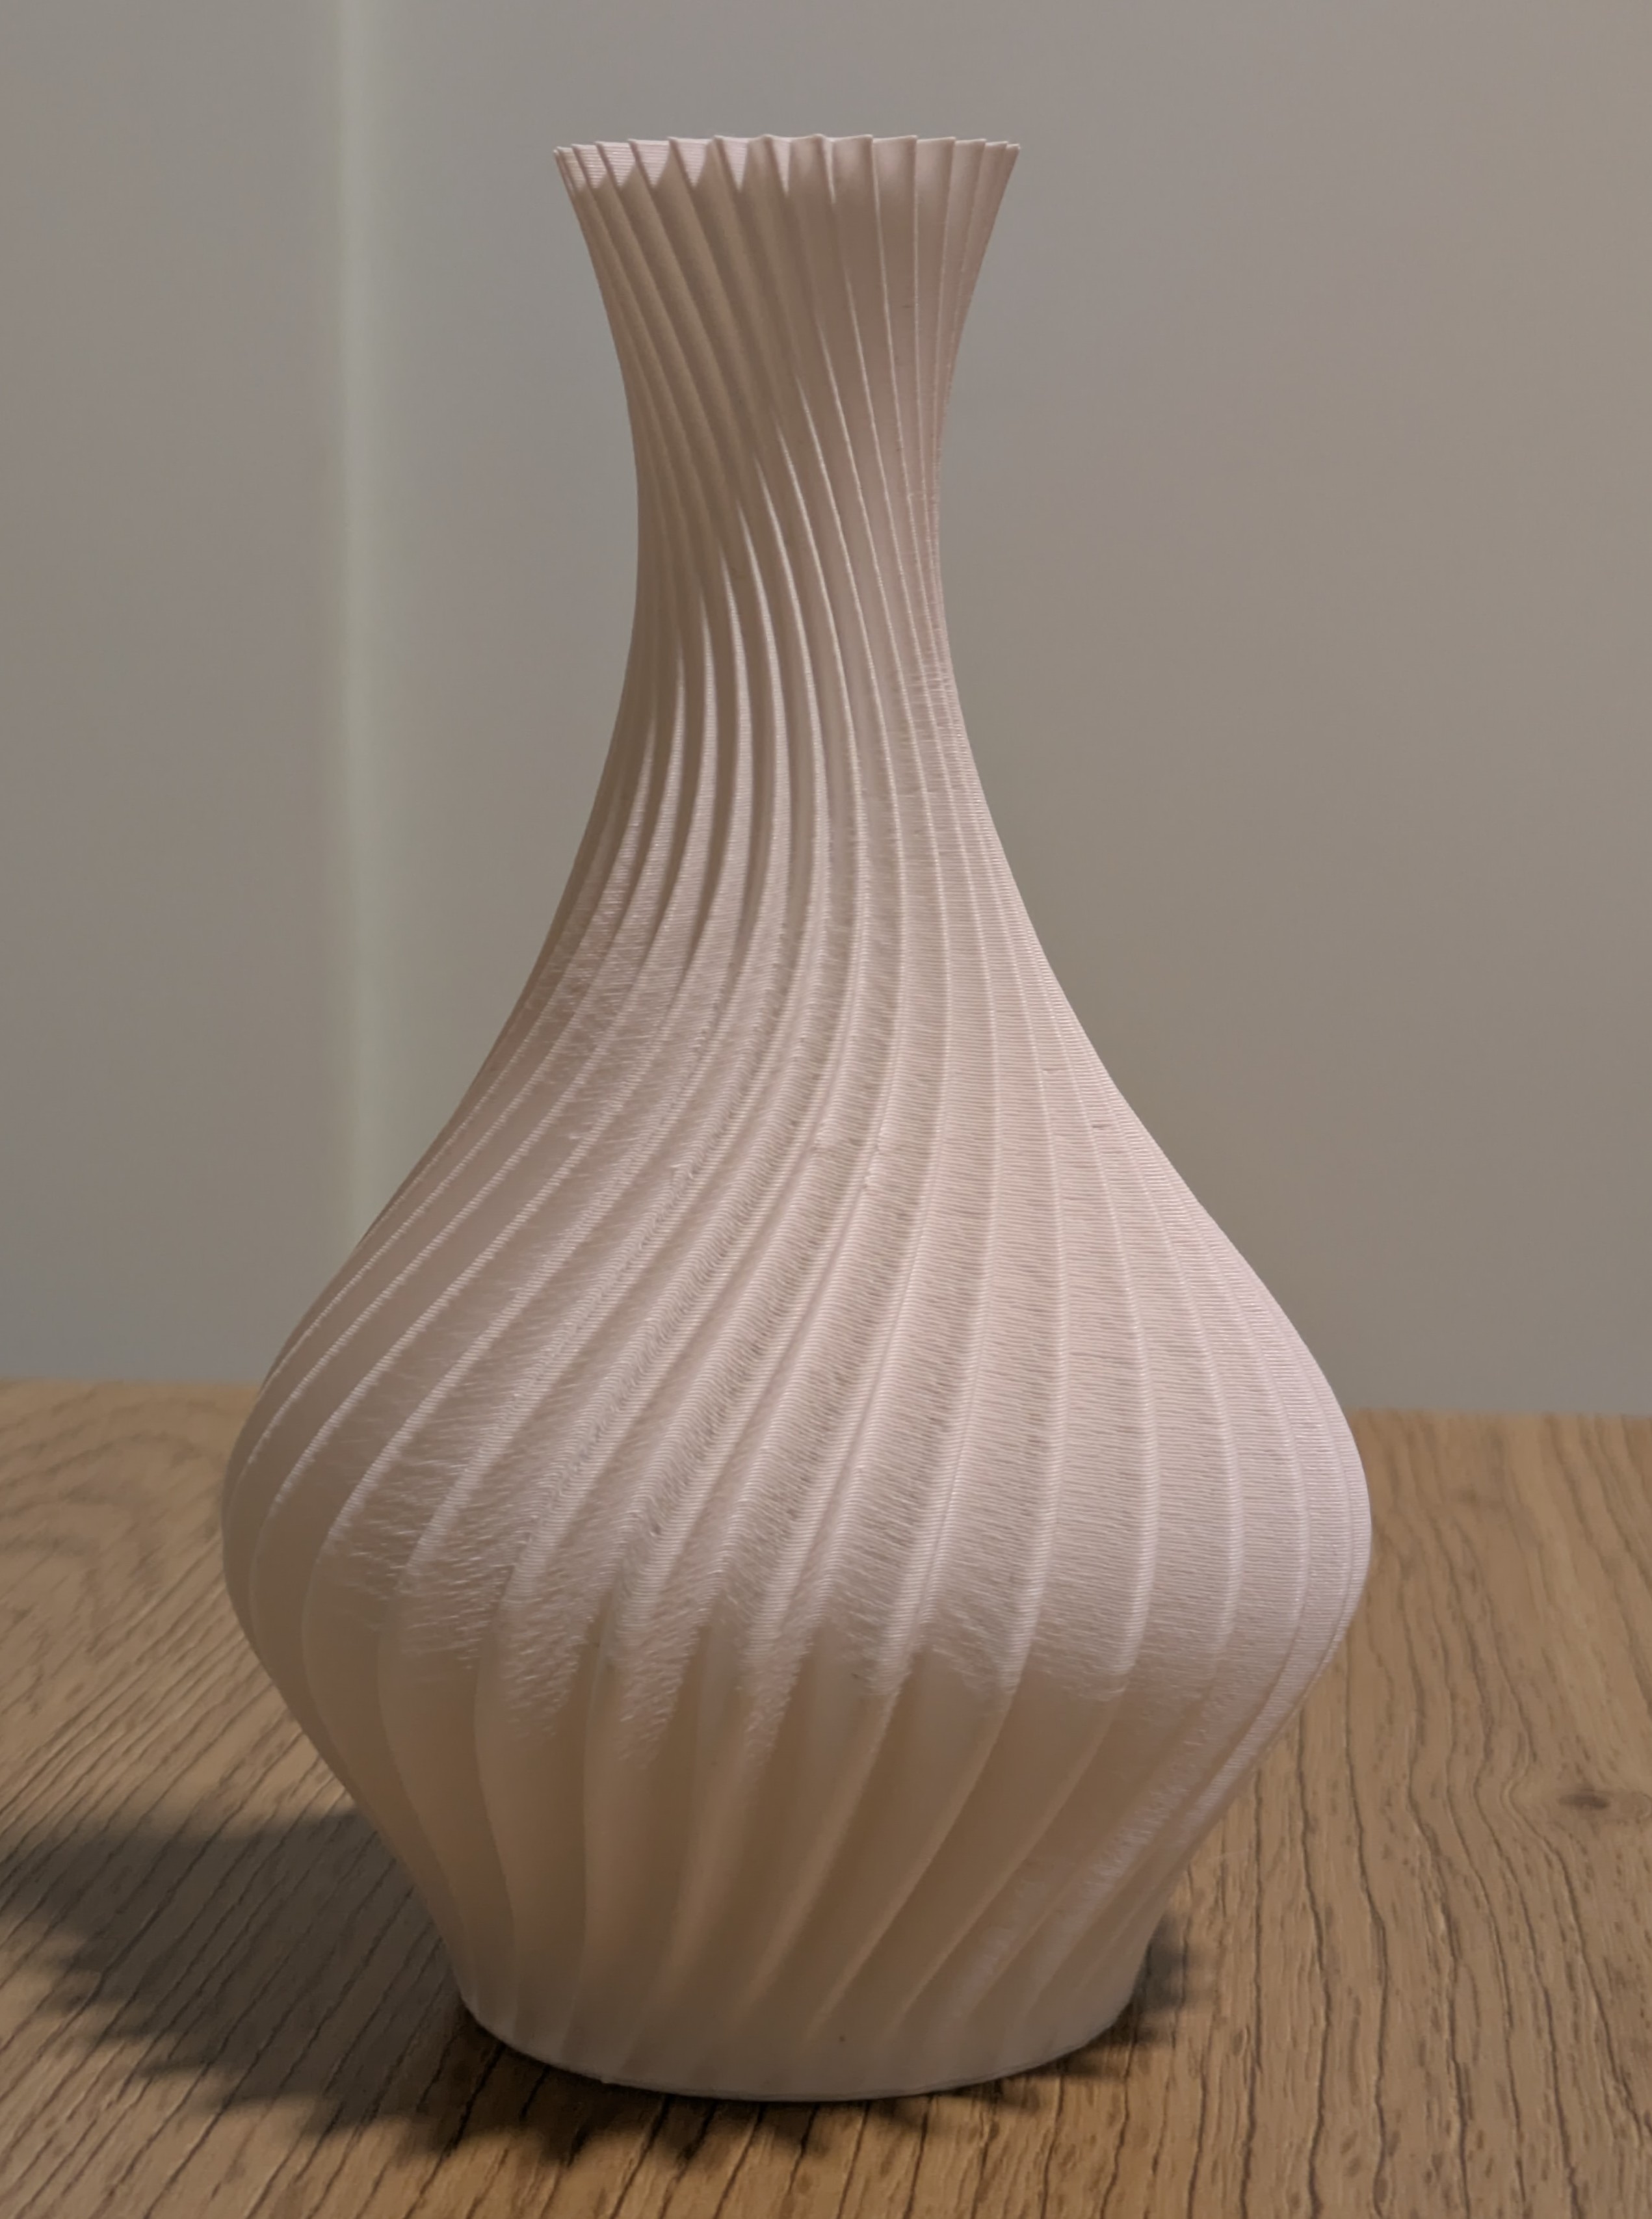
Vase
Entryway Catchall Tray
First more serious functional print — a tray for small items in the entryway (keys, coins, random stuff).
For this print I decided to try special OrcaSlicer features:
Variable layer height — automatically reduces layer height on curves and edges for better surface quality. Print time increased noticeably, but details came out smooth.
Ironing — the printhead passes over top layers with extrusion disabled, smoothing the surface. Added even more time, but the bottom surface came out very even and smooth.
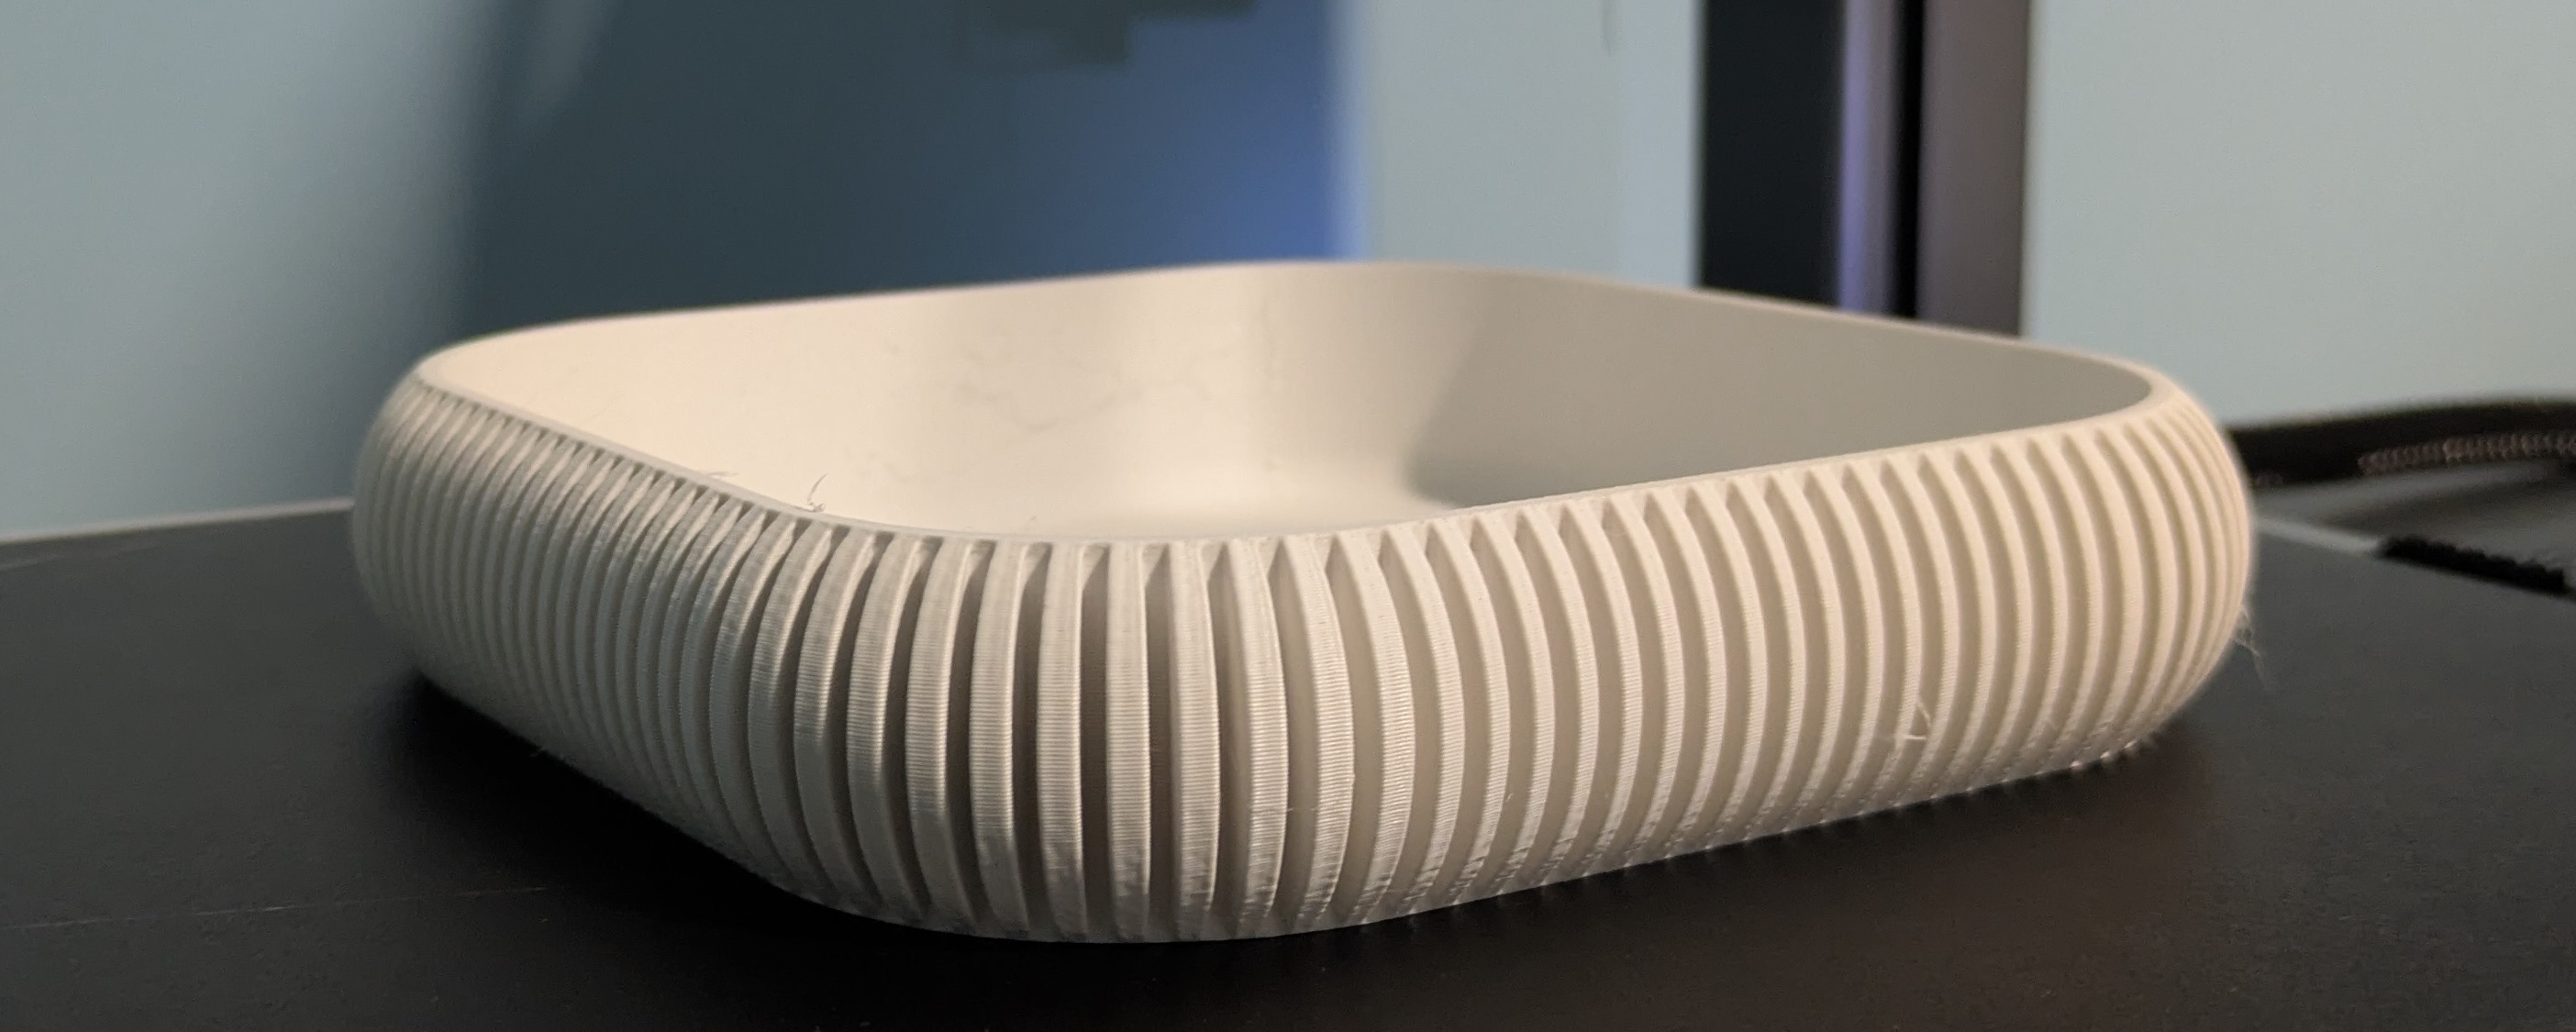
Tray with variable layer height and ironing
The result was worth the time spent, the item looks quality. There were minor defects (thin strings between ribs), which I easily removed with cutters and a piece of sandpaper.
Printer Control Options
Display
Basic control: starting prints from printer memory or flash drive, filament change, manual control, settings.
Fluidd (Web Interface)
The printer runs on Klipper with Fluidd web interface. You go to the printer’s IP with port 4408 in a browser (e.g., http://192.168.1.100:4408):
- Print control
- Temperature monitoring
- Access to Klipper configuration
- Command console
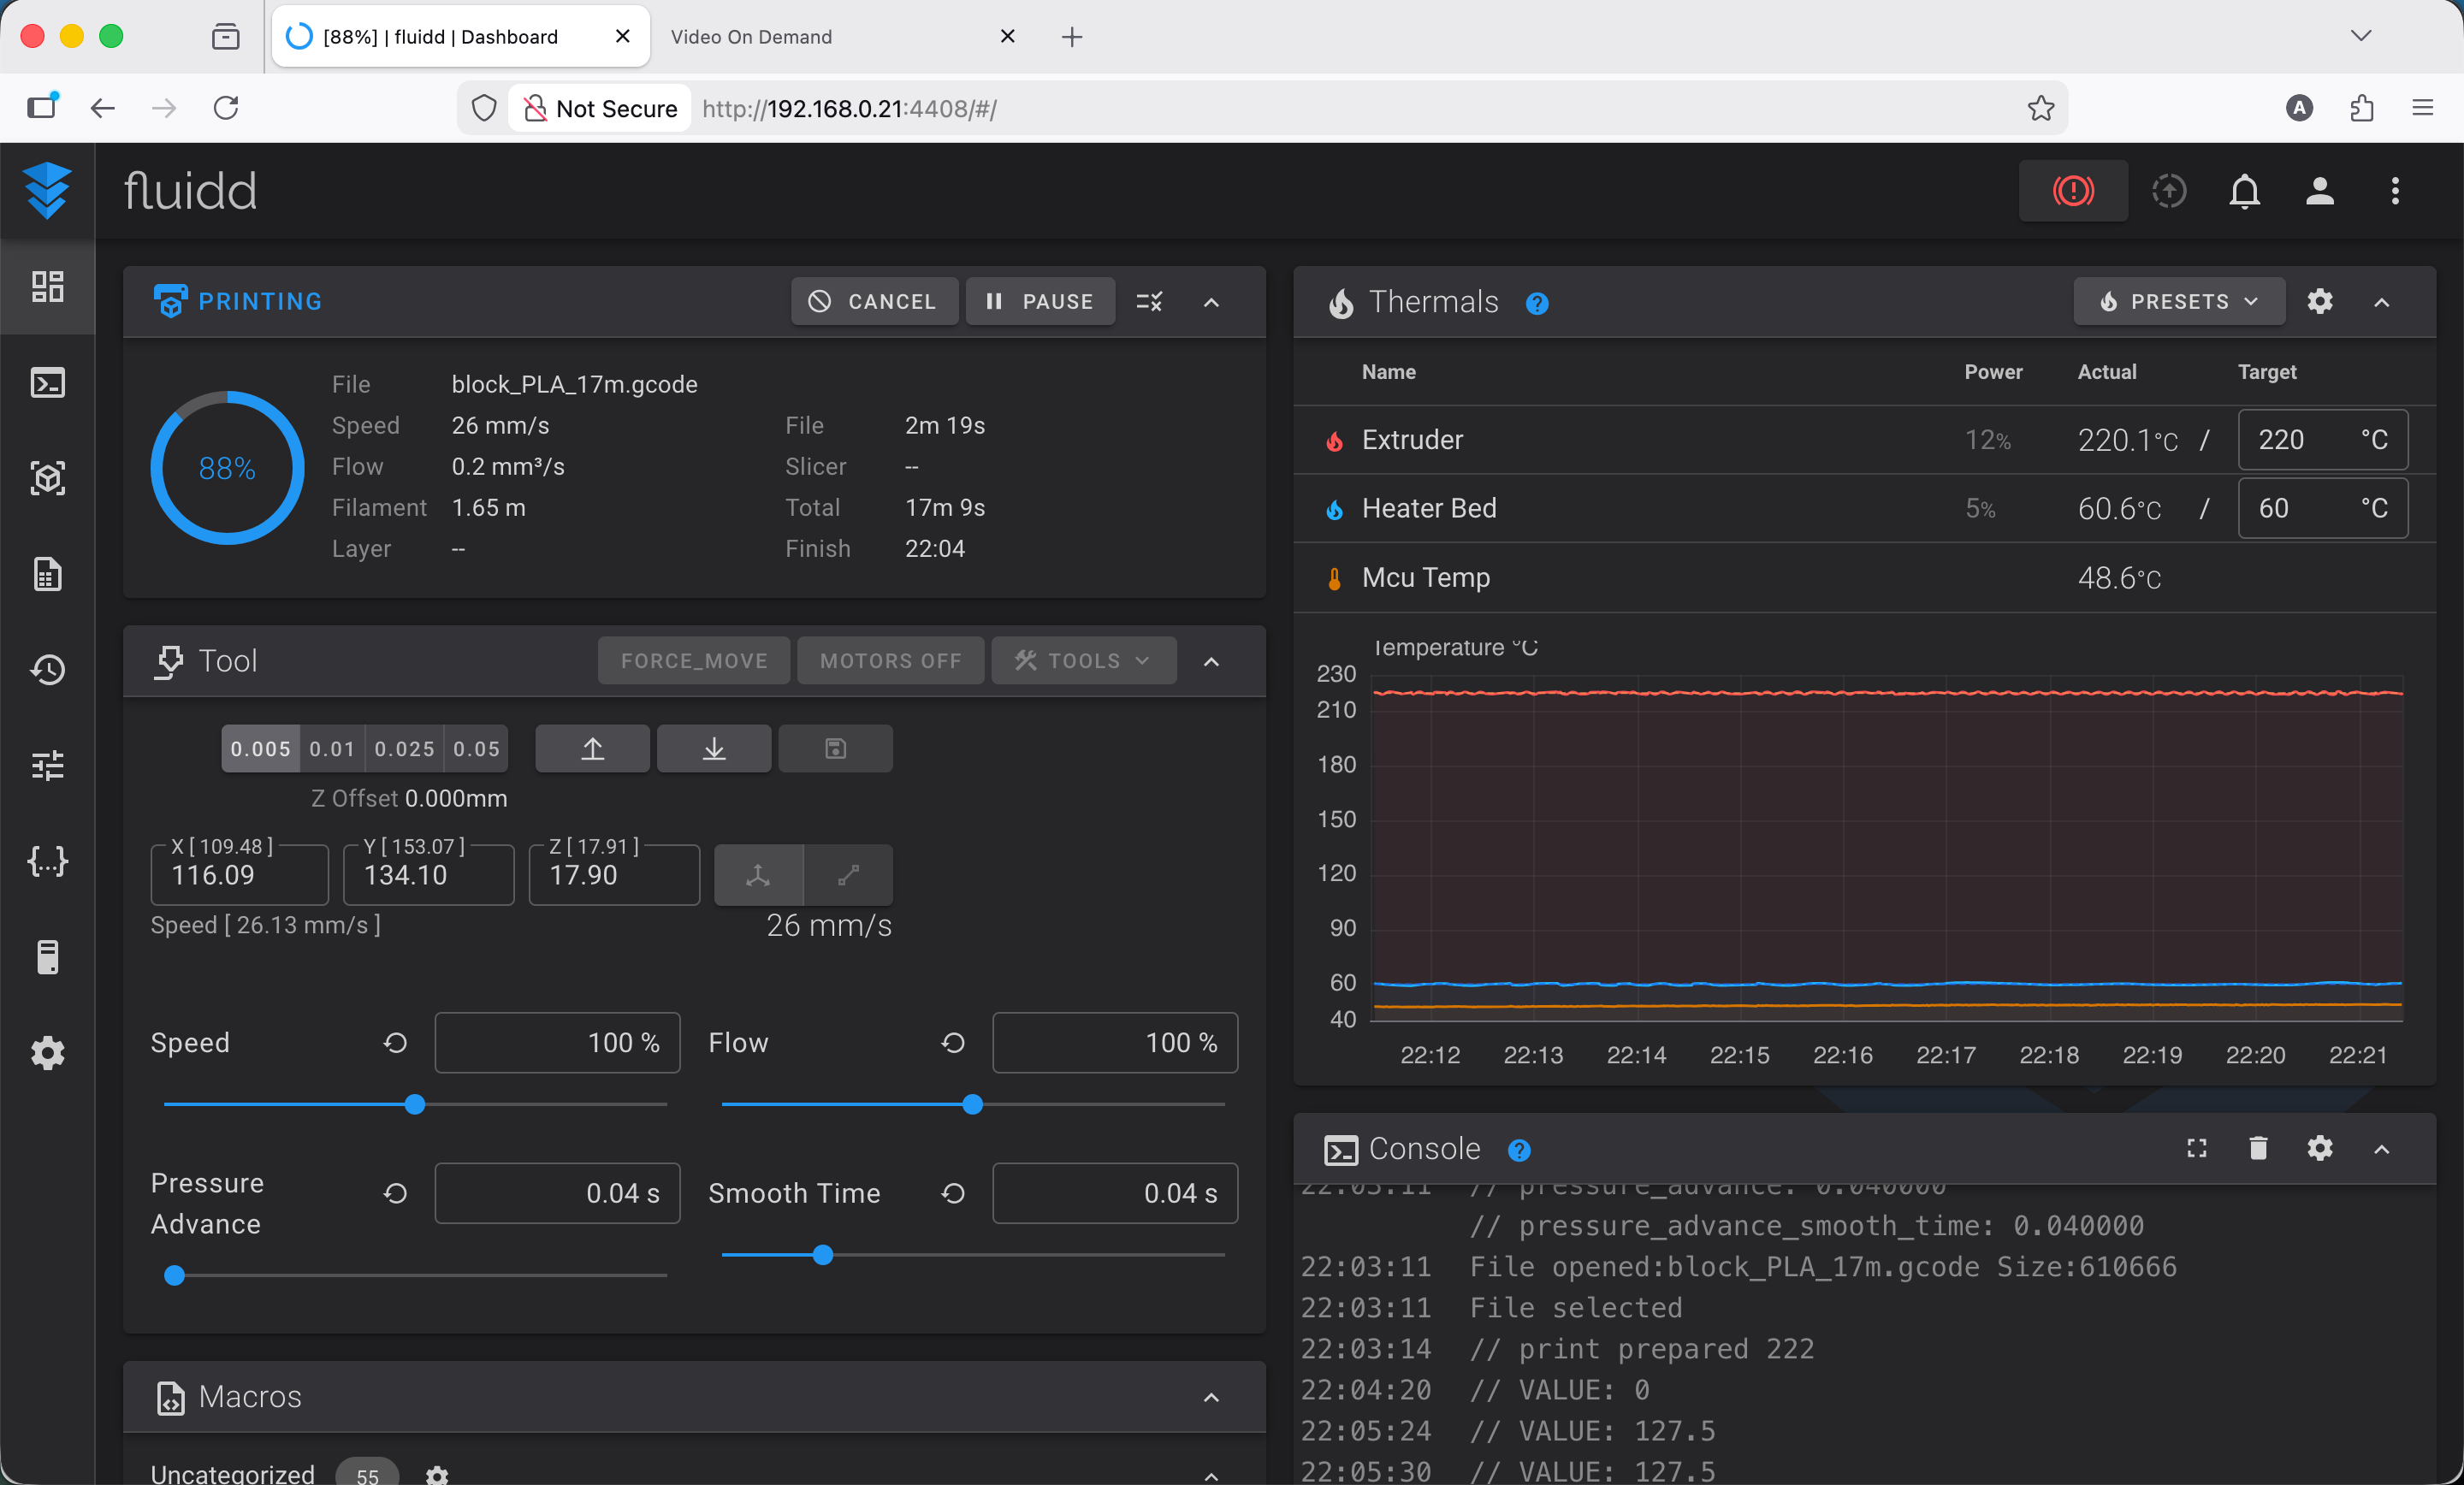
Fluidd
The built-in printer camera should also display in the Fluidd interface, but it doesn’t. You can find it on a separate port 8000:

Camera interface on port 8000
OrcaSlicer
Converting 3D models to print instructions and sending to the printer over network.
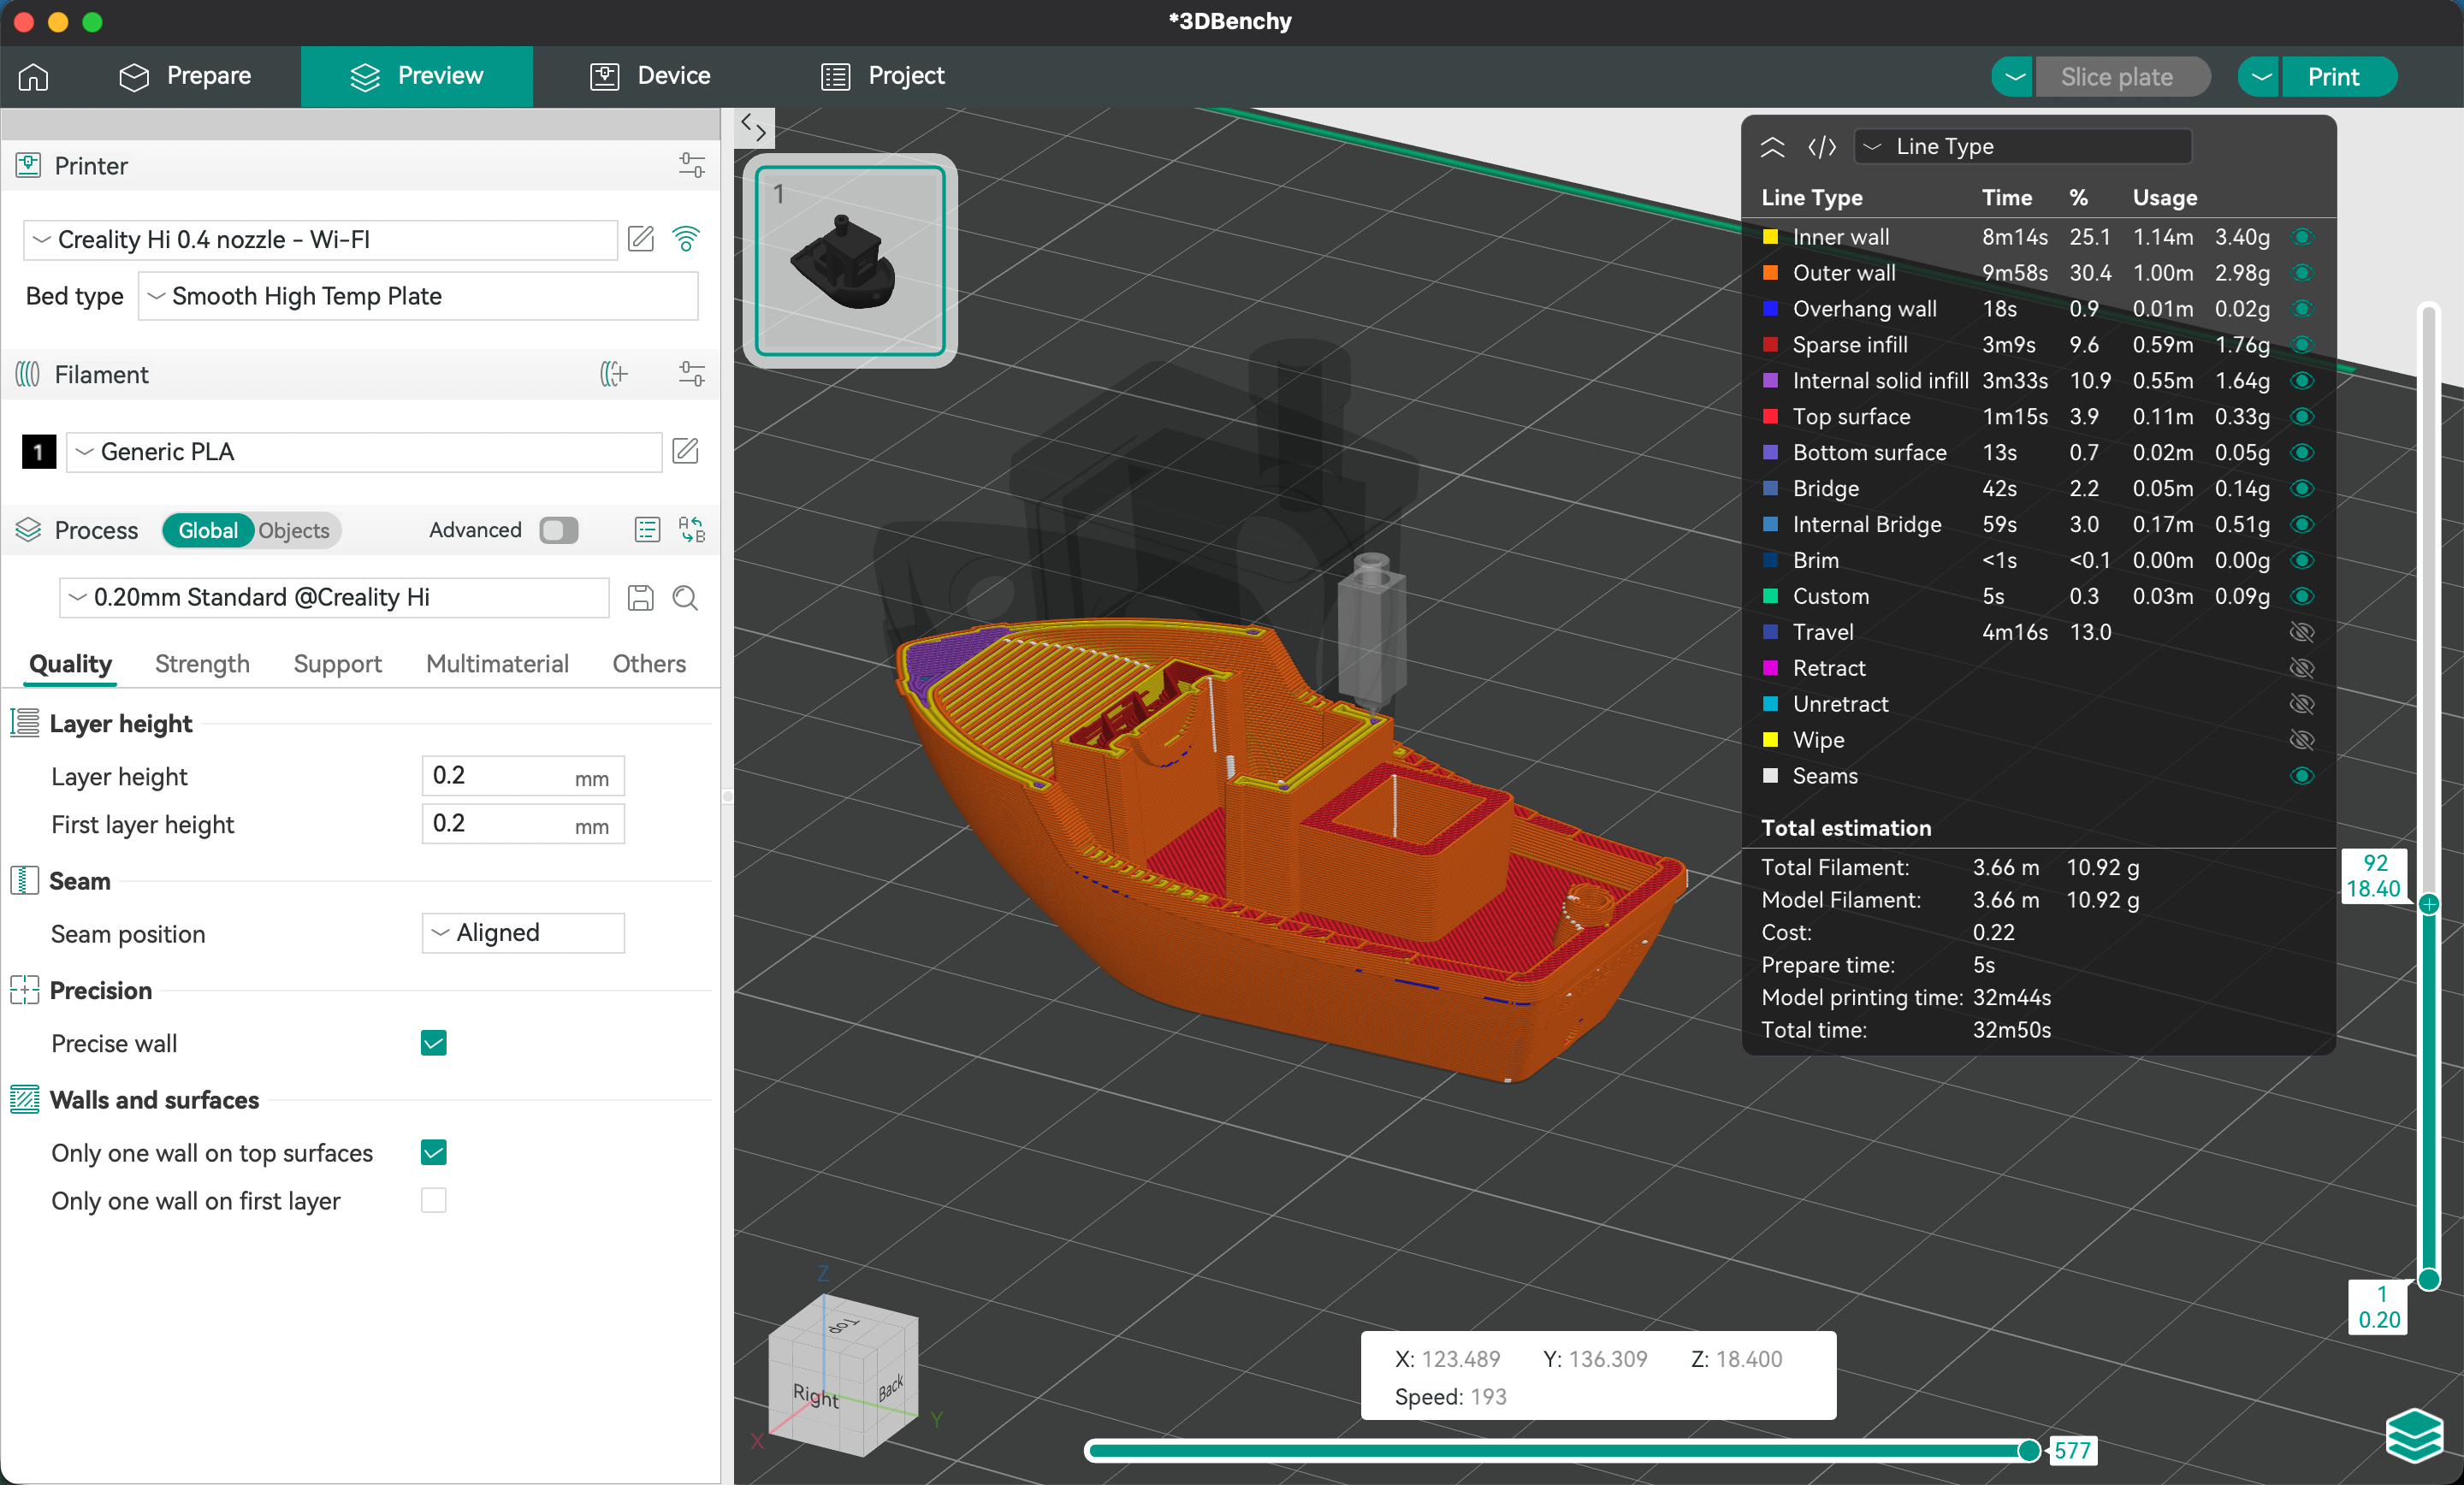
OrcaSlicer, Benchy model cross-section
Creality Print
Official slicer from Creality. As far as I understand it’s based on the aforementioned open-source OrcaSlicer, but with limited features. Looks very similar, but the interface is an eyesore, hard to read text on a semi-transparent background.
Despite all these problems, I most often used Creality Print. The main reason: it has the built-in camera working “out of the box”, which makes it easy to monitor printing remotely. OrcaSlicer doesn’t have this integration unfortunately, and for convenient monitoring and the ability to skip the long calibration before printing, I was willing to put up with interface shortcomings.

Creality Print
SSH
Full system access. I don’t know yet what this might be useful for, but in my opinion it’s good that the manufacturer allows advanced users extended control over their device.
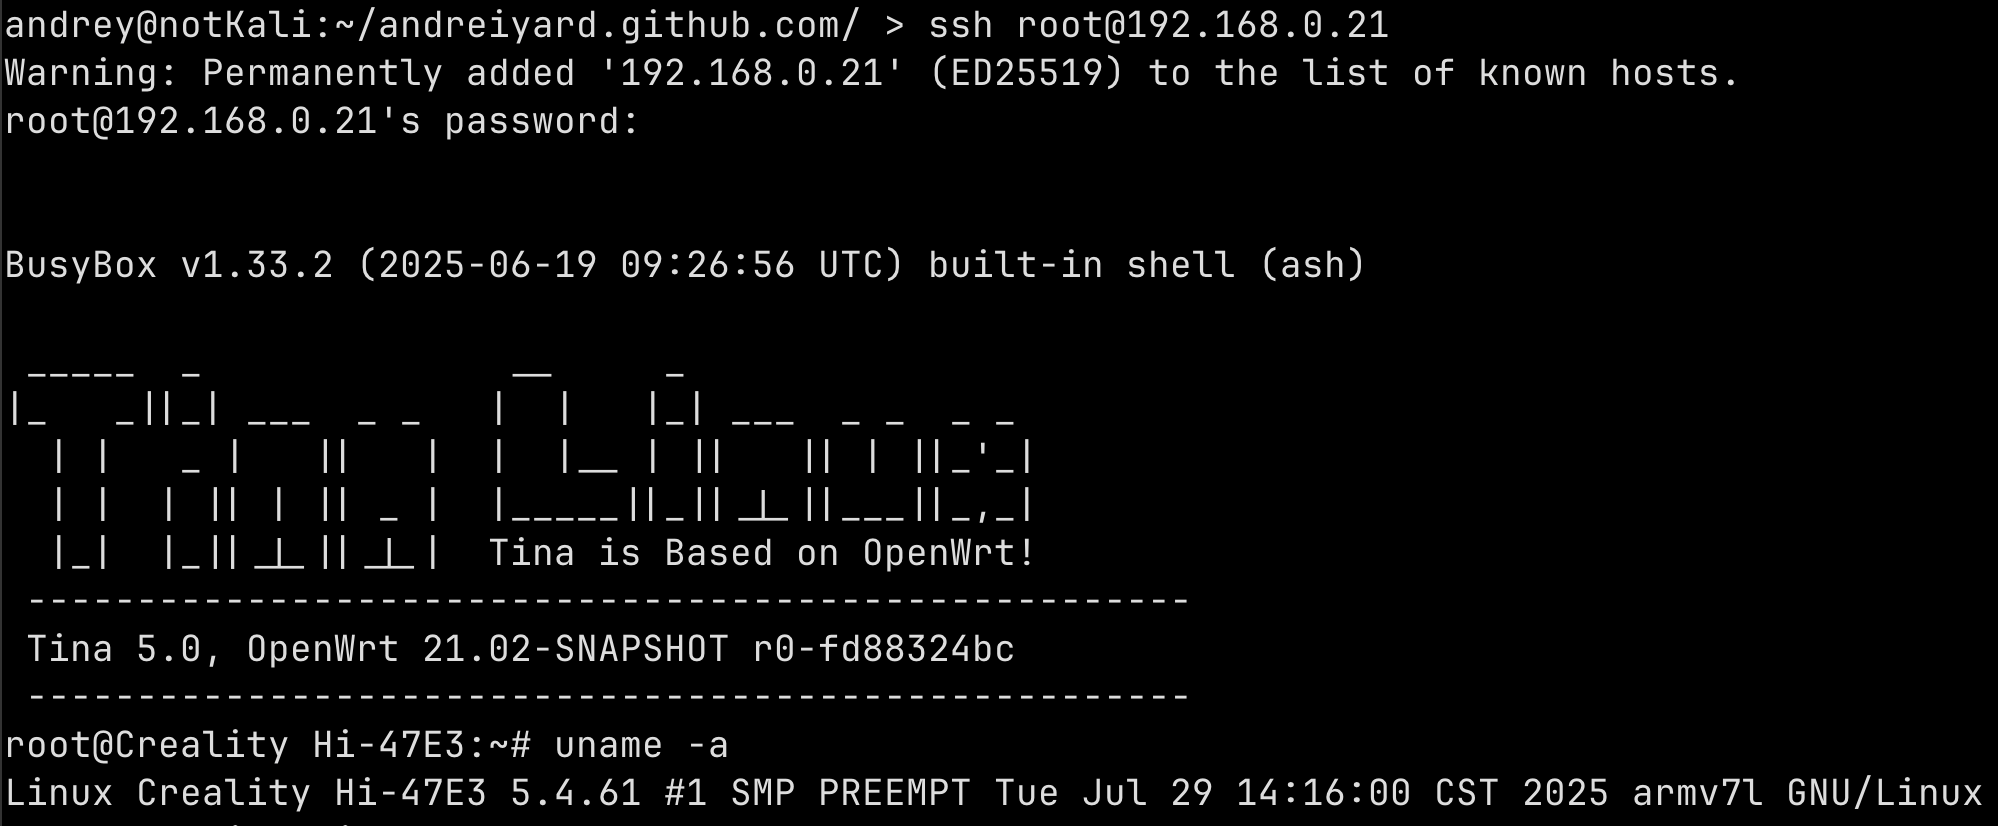
Connecting to the printer via SSH
USB
The classic way, file on a flash drive, insert into printer, start print. I didn’t try it since Wi-Fi transfer is much more convenient, but I think the good old way should work without problems.
Impressions
What I Liked
- Easy to start using. Assembled, turned on, printing.
- Print quality with default settings is fine. I expected the layers to be more visible, but in fact if you don’t look closely at the finished item, it’s not immediately obvious that it was printed on a 3D printer.
- The printer isn’t locked into the manufacturer’s ecosystem. If I need to change some parameter or use a non-standard slicer, I can do it.
What I Didn’t Like
- When using OrcaSlicer, the printer runs a full bed calibration before each print. In theory it’s enough to calibrate once after powering on. I haven’t figured out yet if this is a bug and how to fix it, but those first 10 minutes of calibration are unbearably tedious.
- The camera is pretty bad and you can’t make out any details, low resolution and poor dynamic range. The LED light creates a narrow spotlight and provides insufficient lighting in darkness. Although it’s worth considering that having any camera at all is already a plus.
What’s Next
While printing these simple things from PLA, a first real task appeared: making a handle for a cabinet to replace a broken one. This is a great excuse to try designing and printing my own model. I’m currently in the design process and will write about it in the next article once I’m done.
And then I’ll start experiments with PETG, a stronger material for printing that very Lab Rax server rack. PETG is more demanding than PLA and I might need to solve some related issues.